Showing posts with label Textiles. Show all posts

Monday, February 4, 2013

365 Journal and stuff

Not much to say about my journal pages.  I'm using an A3 Pink Pig book this year.  Check out Kate's blog for more info and inspiration.


I had a little play yesterday with transfer inks.  They work on polyester fabrics, also on a polyester mix but less well - it absorbs less of the ink.  It works so well on Evolon (a woven polyester fabric) which is the heart labelled number 2.  I also used the Evolon with the plant material.


Basically you paint the inks onto copy paper then iron it onto fabric so you can paint solid colour or paint a design onto the paper or cut shapes out of the painted paper.  With the plant material you place it onto the fabric, put the painted paper on top then iron over it.  Also transferred some of the ink to organza ribbon shown at the bottom here.

I've also made some organza flowers, one made using a tea-light to shrivel the edges of the organza and the other 2 using a heatgun.

Wednesday, January 23, 2013

Polyfilla.

I was filling a few holes in the craftroom wall with Polyfilla and decided to use some on a canvas.  I used a Stewart Gill butterfly stencil which I've had for many years and the edge of a stencil along the bottom of the canvas.  The canvas measures 5"x7".  The paints are watered down Daler Rowney, with mica powders over the top. The parts of a page is a butterfly description from a dictionary.


This other canvas measures just under 8" square and is a box canvas.  I used gel medium on this one, not Polyfilla ;-)  The inspiration for this was taken from Creative JumpStart run by Nathalie.  It's not complete but I thought I'd show what I'd done so far.  I'm thinking of printing off a bird tuse; do I need a dark; possibly black; image or light?  What do you think?


Also getting a 'jumpstart' from Nathalie's blog I did an image transfer.  I didn't have the transfer medium shown in the video so used gel medium.  My intention is to use the image on something such as a purse, phone case or such.   The dragonfly measures 3.5" x 2" Quite often I'll try out a technique, for paper or fabric, or just have a play if it's something I've done before but not actually make something out of the end result.  I want to try to make more things in future when I've had a little play.  I decided not to trim the dragonfly before transferring it to the fabric, but if I'd wanted a neater finish I would have done.

If you sign up to the Creative JumpStart 2013 you get regular 'JumpStarts' from such people as Julie Fei-Fan Balzer, Claudine Hellmuth, Dina Wakly, Nathalie herself and many more.

Monday, July 23, 2012

Monochromatic

Some weeks ago I decided I'd get some fabric and stuff out and make something without having a clear idea of what.  I couldn't decide what to use as a base but I bought some cheap cleaning cloths made from recycled materials, not for this project but ended up using one for the base.  They were soft and a reasonable thickness but had stitching all over.  I decided to take all the stitching out, as they were that type of 'chain' stitch that undoes easily it didn't take long.  However that was when I discovered the reason for the stitching - the cloth was very much like cotton wool with a gossamer thin fabric enclosing it; the stitching basically held it together :-/  So decided to felt it on my much underused Embellisher (needle-felting machine) and add bits and pieces using the embellisher - organza, tulle, angelina, shimmery polyester fabric, lace and some handmade paper.  I did some random, free motion machine stitching all over then added beads, hearts made with angelina fibres and sequin type butterflies and leaves.  The fabric still isn't very robust but I intend to use Bondaweb to fuse some fabric on the back.


I had another little play with fabric and paints, this time using transfer paints.  These are great, you paint them onto copy paper then iron onto fabric.  You can paint a design or picture onto the paper then iron that onto fabric or do as I did just painted randomly onto paper.  Then I got some leaves, placed them onto the fabric and put the painted paper over the top and ironed over it.  This left the leaf design on the fabric.  On another piece I cut out some paper shapes and placed them on top of the fabric before placing the painted paper on top and ironing.  Transfer paints are meant to be used with polyester fabric for best results but I've used cotton fabric with the leaves, the other with cutout paper shapes is polyester.  The plan is to add some machine stitching to these and do something with them.


This shows the painted paper and the cutout shapes after ironing - (the paint having been transferred onto the paper shapes)  The paint is darker on the copy paper than when it's ironed onto fabric.

Tuesday, July 17, 2012

Sun Printing on Fabric

Thought I'd share my little piece of sun printed fabric.
(I was just trying out some fabric paint to see if they worked).  There are specially produced paints for this; Pebeo Setacolor Soleil being one; but I'd read that you can use other paints.  The yellow I used is Dylon Fabric Paint and the green (though it looks more turquise here) is Colourcraft Opaques Fabric Paint.  If you've never done this before it's very simple.  Just wet your fabric (don't saturate it) then brush paint on.  Place a stencil, leaves/grass, cut out paper shapes, anything you like really that will create a pattern, on top and leave it in the sun till the fabric is dry, et voila!


Also sharing a card I've made for my friend.  I printed the greeting on the computer using the 'glow' facility in Word which adds a little glow round the letters, added a bit of distress ink to the centre of the card then stamped the owl with black ink.

Monday, February 6, 2012

366 Journal, other stuff and £100 refund ;-)

Firstly apologies to those who left comments on my last post.  I haven't tried to leave comments in the last couple of weeks but you may remember I couldn't on most blogs.  I'm hoping I can now if not I'm going to try installing Firefox to see if it makes a difference.
Onto the 366 Journal.  I wasn't really happy with the borders I did on January's but didn't get round to trying to take them off and do something different.  February's pages were ready on time but I only photograped them  couple of days ago.  To see more pop over to Kate's.


For the doll group - now the craftydollybirds - we had a challenge to do a Bridal Panel use any theme we liked.  I chose Gothic.  If you want to see the rest pop over to our blog
I made myself a Kindle cover, thought I'd show the inside as well.  I did consider just doing a kind of bag to just slip it in.  If you want to see how this fabric started out look here :-0 May 2009!!!


Lastly; I purchased a laptop from Dell before Christmas.  I'd phoned up as I was having problems with the DVD drive onmy Dell PC and ended up buying a new laptop.  I had been considering it as my PC was about 5 years old and getting very slow plus the problem with the DVD drive.  I was told I was getting a good deal as Dell were doing an offer for Christmas.  I was happy with the price but wondered what price it was on the website.  I couldn't find the same one but found one I thought had a better spec and was cheaper.  Anyway to cut a long story short I wanted Dell to compare the 2 and explain to me the difference.  I emailed them 3 times in all starting 6th January each time receiving an email to say someone would contact me.  I also phoned but think I was talking to someone in India and he didn't have access to the emails I asked if he couldn't get access somehow.  He got frustrated when I insisted that he should be able to as it was all customer services and I didn't want to be put through to someone else as I was paying for the phone call and he put the phone down on me!  Disgraceful behaviour from Customer Services.  After the last email someone did phone and when I explained the situation but said I didn't now have the detailsof the laptop I compared mine to but that I'd put it in the first email.  The outcome was he offered me £100 refund, yahoo!  I think that was mainly 'cos I'd sent 3 emails and phoned without any success.  Anyway good for me in the end :-)
Edited as I'd left the 2nd pick of the Kindle cover out and didn't do the link to the fabric correctly

Thursday, July 7, 2011

What I've been up to

I've hardly blogged in the last couple of months, just don't seem to have time - it's not the blogging itself as such, it's just that once you enter Blogland and start visiting you get caught up with so many interesting blogs and get sidetracked following links.
I have painted the spare bedroom and am going to move my craft stuff back upstairs from the kitchen, that will probably take a year to complete haha.  I've also painted the bathroom. So I've not been idle.  I hate painting ceilings and hate the cutting in!  But on to more interesting stuff, I've made canvas postcards (the grain of the canvas seems to have affected the clarity of the picture here) and a mug rug at the doll group in recent months; decorated a torso with the 'Ladies Who Lunch' we've have also made a hanging thing but I have yet to attach the means by which it will hang; made myself a car seatbelt thing too (just so you know, the white strip is one side of Velcro for fastening).  I dont know if it's just short people who suffer with the seatbelt chafing the side of the neck.  The mug rug is rectangular rather that square to allow you to put your biccies on too - due to the name 'mug rug' I'm assuming these originated in America.  The chicken hangy thing was a project in Craft Stamper by Helen (sorry can't remember her surname)


Sunday, April 3, 2011

Making My Own Lino Print Block, Plus 365 Journal Pages for April

I've had the lino block tools and a piece of lino block for years!!  I got mine from Fred Aldous which is based in Manchester, but they used to have a little shop in Chorley, Lancs.  They have a fantastic range of products but some products you may be able to get cheaper elsewhere.  I did cut something a long time ago but have since discarded it.  What got me thinking about making a print block was seeing the beautiful Indian Print Blocks from Colouricious at the NEC.  I've used mine in two ways.  The green design was made by rubbing a Markal Paintstik over the top of the block, these are oil paints in a stick.  The gold design I did by painting gold fabric paint over the block, putting the fabric over the top then rolling over with a brayer.  I've made a negative design though it does look here as though the design is raised it isn't - taken from 'Pattern Motifs: A Sourcebook', by Graham Leslie McCallum.


Now for my completed 365 Journal March pages - I wet the back of the righthand page too much while preparing April's pages which made the ink run on my little birds, but think I've managed to rescue it reasonably well.  I've used a mix of Brusho and Koh-i-Noor waterbased dye for April.  I do like using both these products but you have to be very careful 'cos they do bleed extremely easily.  I've also used my new white matte Craftynotions spray with a couple of stencils.  For more info about the 365 Journal pop over to Kate's :-)


Friday, March 11, 2011

Fabric tags; plus pic of Phillipa

I've made some fabric tags today; well they're not quite complete and they're not really tag-shaped!  Thought I'd tell you how to do them and indeed how to print other stuff onto fabric.  I coloured some calico with Koh-I-Noor waterbased dyes which are in a little palette like watercolour paints.  I got mine from Art Van Go.  I wet the fabric first then just 'painted' the dyes on.  When the fabric was dry I trimmed it so there were no loose threads then ironed it onto a piece of freezer paper; cut the freezer paper a little bit larger than the fabric.  The freezer paper enables it to be put through your printer - simples :-)  You need to iron the fabric onto the shiny side of the paper.  You'd think you'd be able to buy freezer paper in the supermarket!! but I've never seen any; if anybody knows of any supermarkets/food stores where it can be purchased, please let me know as I'm sure it would be cheaper than buying it from textile craft suppliers!  I believe you can buy it in supermarkets in the USA.  I'm going to glue the 'tags' onto tissue paper to stiffen them.  I printed some quotes onto the tags.  Now if you see the one attributed to Einstein you may think 'that's just not cricket'! but I think he was being jocular :-)


I've also received my saltdough dolly from the wonderfully talented Donna of Doings of Doone.  Her name is Phillipa, isn't she fabulous? I love her ;-)  This was for playing along with Pay It Forward  If you want to see how Donna makes these dolls check out the videos on her blog.

Sunday, January 23, 2011

Mouse pincushion and a sneaky peek

At the doll group yesterday (we meet monthly in York) we had a choice of making either a mouse pincushion or one with a row of owls.  I made the mouse and here she is.


I've also done a double page in Ann's circle journal but just showing a sneaky peek till it's been returned to her.  The journal is 5.75x8.25 inches.  This bit is roughly 1.5x3.5 inches.  The dark bit is actually transfer foil but the shine doesn't show here.
I said a few days ago that I'd put comment moderation on as I'd had quite a few adverts and some strange comments.  I say strange 'cos when you read them they seem to be proper sentences but don't make any sense at all - anyone else had those and can anyone explain them.  I was very surprised to notice just how many spam comments there were in the spam folder - I never knew where the spam was before I'd never noticed it and when I read some there were several variations on the nonsense ones, same vein similar sentiments if you will but different words.  Can anyone tell me how some of these work though as 'cos some seem to be just advertising but buried in old posts.  Why put them in old posts?  If they were viruses surely they'd infect your PC once they've posted them not just when you publish them :-/

Sunday, November 21, 2010

Getting Plastered

We had a fantastically messy playday yesterday at the doll group.  As I've explained before although ostensibly a cloth doll group we do much more, yesterday being a case in point.  The work? (I question the use of that word 'cos it was pure fun :-)) we did yesterday was the result of some of the member; our leader included; having attended a workshop with the author of the book 'Get Plastered, Plaster, Print, Stitch'  I don't have the specific recipe for the plaster mix but it's basically a dollop of white emulsion paint, a dollop of PVA glue and enough plaster to mix to a single cream consistency, though in fact ours was thicker and worked fine.  Then we took a strip of calico and painted areas with the mix adding texture in the form of lace, string, bits of thread, stamping into it (you can use rubber stamps but wash immediately) etc.  You can also stitch into the calico first then pull some of the stitches out after plastering - of course you can do anything you like but just giving some ideas if anyone would like to try but may be stuck for ideas.  On one of my 'squares' I've added a piece of textured wallpaper but on another just used a piece of textured wallpaper underneath the fabric while painting the plaster mix on; you could use your stamps in this way without having to clean them but I think you would need a stamp with a strong outline to show up.
Then paint with any medium you like; if using acrylic paints they need to be watered down well to a runny consistency.  I've used Brusho (see end for description) on mine and added a little mica powder in places once dry.  My pieces are far from complete, I'm going to add some stitch and embellishments, maybe some images etc  You are meant to iron on the back when it's dry, though I'm not sure what this achieves as it didn't appear to make any difference.
I've done 11 'squares' altogether (the top 2 pics)


BRUSHO is a form of transparent watercolour available in an extensive range of exciting colours, supplied in small drums containing dry, crystalline powder. They mix instantly with cold water to produce a painting medium that is renowned for it's versatility.

Thursday, November 18, 2010

Mini art quilts


I can show the mini art quilts in full now :-)  On the fishy one I've used organza ribbon to represent scales.  The picture looks a little fuzzy, this is due to the organza I've used on top of felt.  Just so you know the stitching on the seaweed is intentionally wonky - though I do wonky very well even when it's not intentional (but not quite this wonky) LOL
Translation should you need it (Elizabeth): wonky = not straight; lopsided; unsteady. ;-)

Friday, November 12, 2010

Mini Art Quilt number 2

I've almost completed another mini art quilt, just need to do the backing and bind the edges and put something on to hang it.  Not showing the whole thing again as it's a gift, but I'll show it and the other one (shown in an earlier post) once they've been given.  This one measure approx 111/2" square.  The bit showing here is about 5" square.  I've used felt covered with a piece of rainbow organza for the base.
Lovely day here in West Yorkshire, so I hope it's just as nice where you are ;-)

Thursday, November 4, 2010

Creating pages in someone else's journal

Someone asked me if I'd like to do a page in a journal; she'd just completed her pages but the journal belongs to another person.  How scary is that, letting other people loose in your journal :-0  hehe.  As the owner is unlikely to view it here I'm showing my pages.  I started with colour without any idea of where I was heading.  I'd sorted one page and was trying to make a kind of papier mache bird for the other; I used a mix of kitchen roll and book pages and didn't want it too dimensional but when I was painting it I decided I could've achieved the same thing with some thick card and though it would've still been ok to use I started looking for something else for a focal point.  I came across the house I made some weeks ago for the Sunday Stampers'challenge and thought the colours fitted really well with my pages, I just added a little Wild Plum ink to the other page to tie it in.  The pages are a bit greener than they look here.

I've been doing more sewing and am just showing a sneaky peek of a mini art quilt I've made for someone; I'm still a novice at free machine embroidery!  The quilt only measures 101/2"x73/4" and the piece I'm showing is 4"x5".  I've used a mix of sheer fabrics for the background, the stems and leaves are felt.

Wednesday, August 18, 2010

WOYWW 18th August

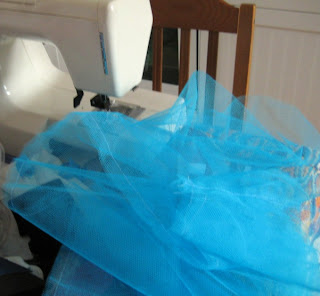
Happy Wednesday WOYWWers :-)  I'm not showing my desk this week as I've not really done anything much at all apart from sewing, mainly altering stuff for DD.  I am showing a cardi that I've altered.  I bought it some time ago from a shop called All Saints, in Manchester.  It's called a Pirate Cardigan for some reason :-/ if anyone has any idea why I'd love to know.  It seemed ok when I bought it apart from the sleeves being about 6" too long, seriously! but I soon discovered that the sleeves were rather tight and I had to drag them up each time I wore it.  I finally found some lovely black stretch lace at £1 per metre so cut up the sleeves and inserted some lace.  I also chopped loads off - just over 6"!! and put some of the lace at the bottom of the sleeves.   I've made some flowers for the t-shirt I dyed the other week, not sewn on yet - do I need 3?  Also not sure about the 'stem' may just use beads or sequins.  Also showing some net for a tutu I'm in the middle of making for youngest granddaughter - it's more of a turquoise than showing here.
 If you'd like to join in this phenomenon called WOYWW pop over to lovely Julia's whose brainwave this was and then dive in, it's all good fun ;-)